- Published on
How to Add a Custom Network to Metamask for Concero V2 Testnet: A Quick Tutorial
- Authors

- Name
- phuchoangle
- @phuchoanglevn
Introduction
Blockchain is not a single network, but a network of networks. There are many blockchain networks, each with its own unique features and use cases. Concero V2 is designed with an innovative architecture that allows it to connect with any blockchain network, in order to unify the world's blockchain ecosystem.
In Metamask, it provides several default networks, including popular mainnet and testnet networks. However, it does not provide all the networks that are available in the blockchain ecosystem.
In this tutorial, we will guide you through the steps to add a custom network to your Metamask wallet.
Add a custom network to Metamask
There are two ways to add a custom network to your Metamask wallet:
- Automatically by using Chainlist
- Manually by adding the network information
1. Automatically by using Chainid/ Chainlist
Chainid is an open-source platform helping users to add mainnet and testnet networks to their wallets.
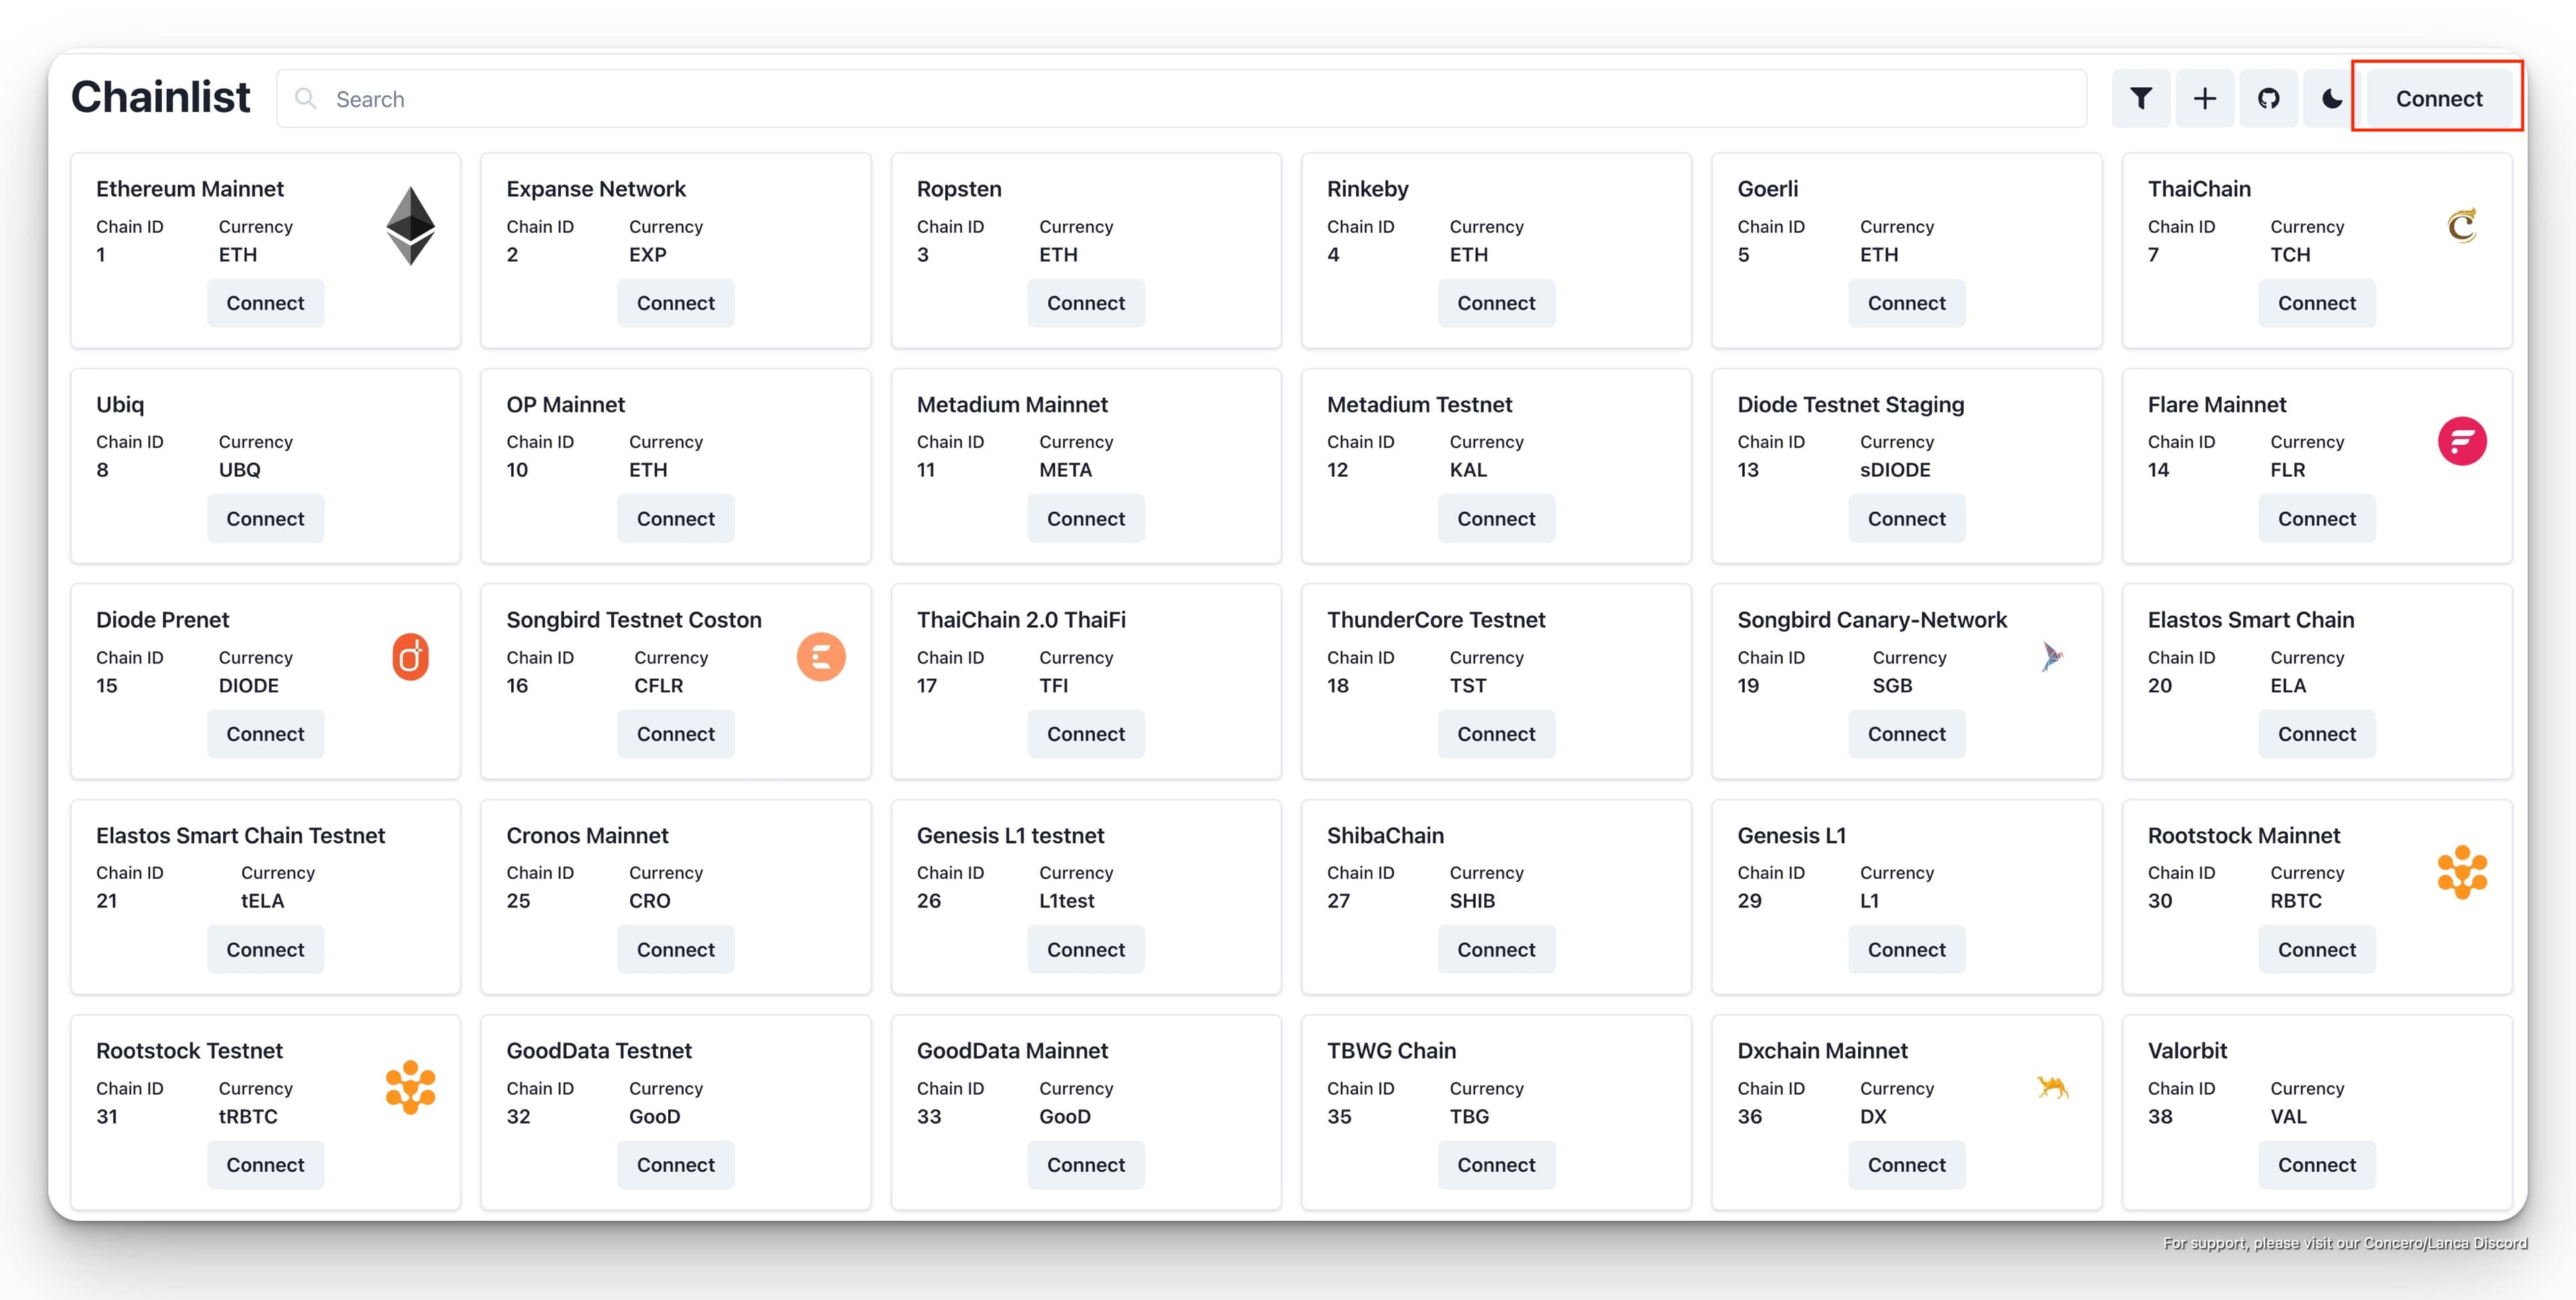
Head to Chainid website and you will see a list of supported networks, including both mainnet and testnet networks. For Concero V2 public testnet, you will mainly interact with testnet networks.
Please Connect your wallet for further steps.
In this tutorial, you will be instructed to add the Arbitrum Sepolia testnet to your wallet. You can do the same for other testnet networks.
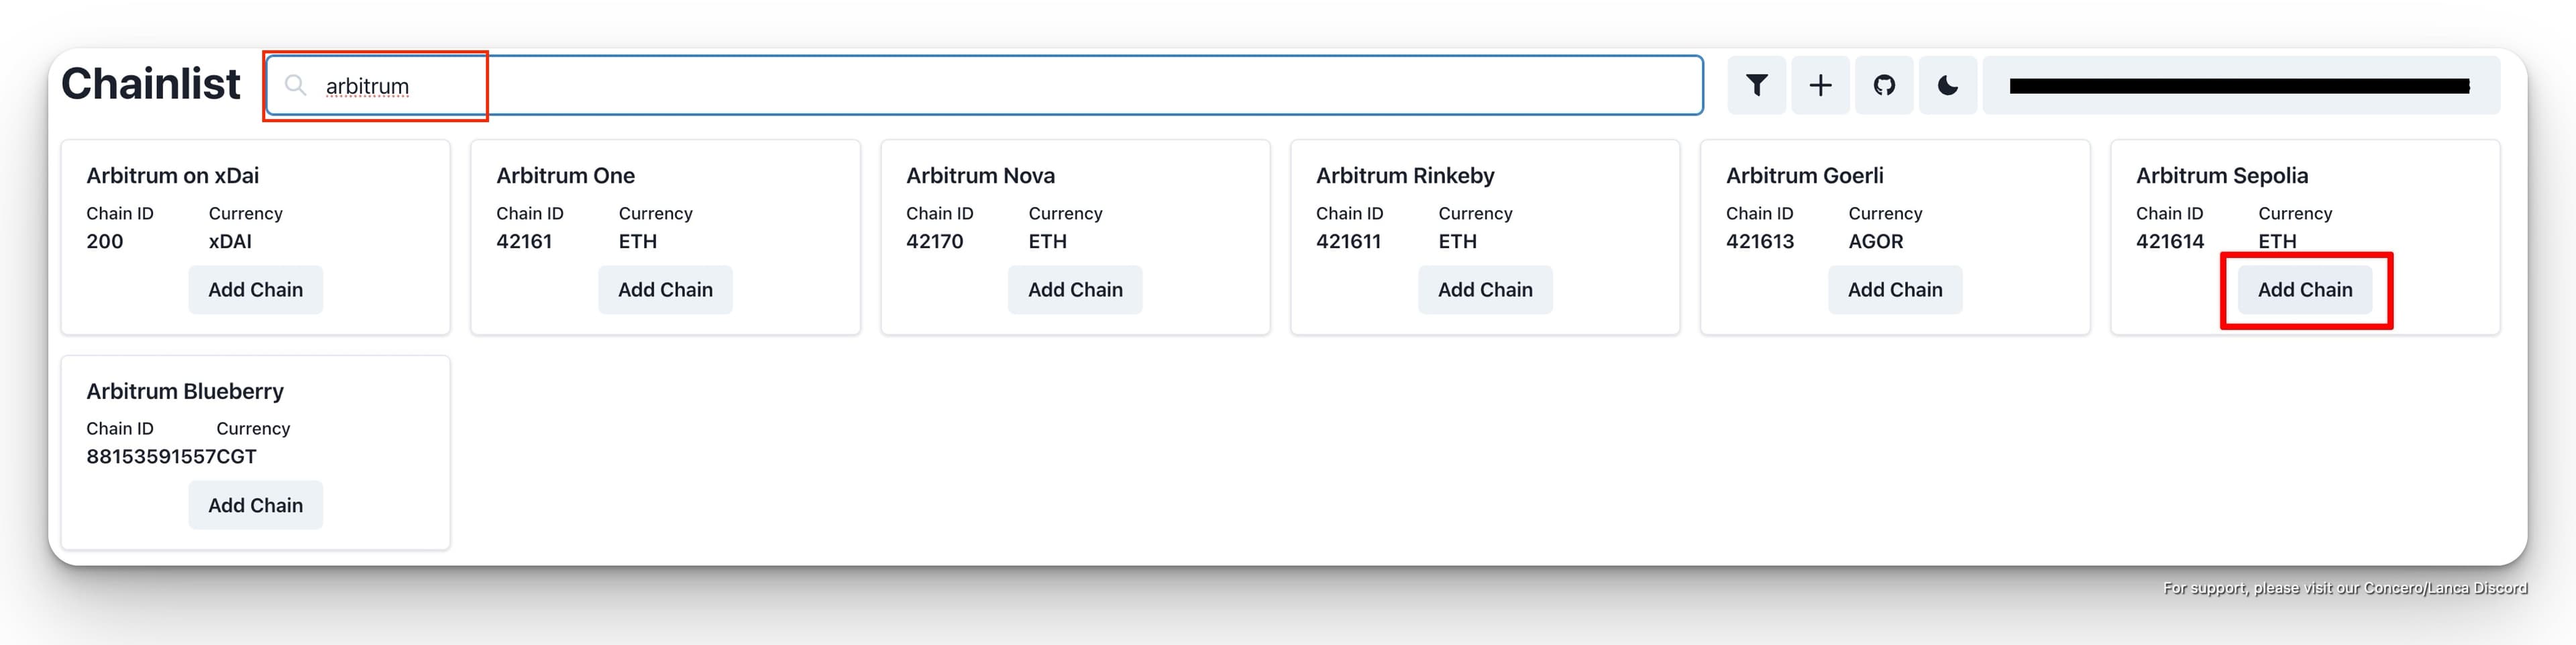
In the search bar, type in "Arbitrum", then it will show a list of supported testnet networks related to Arbitrum.
Select Arbitrum Sepolia testnet, and click on "Add Chain" button.
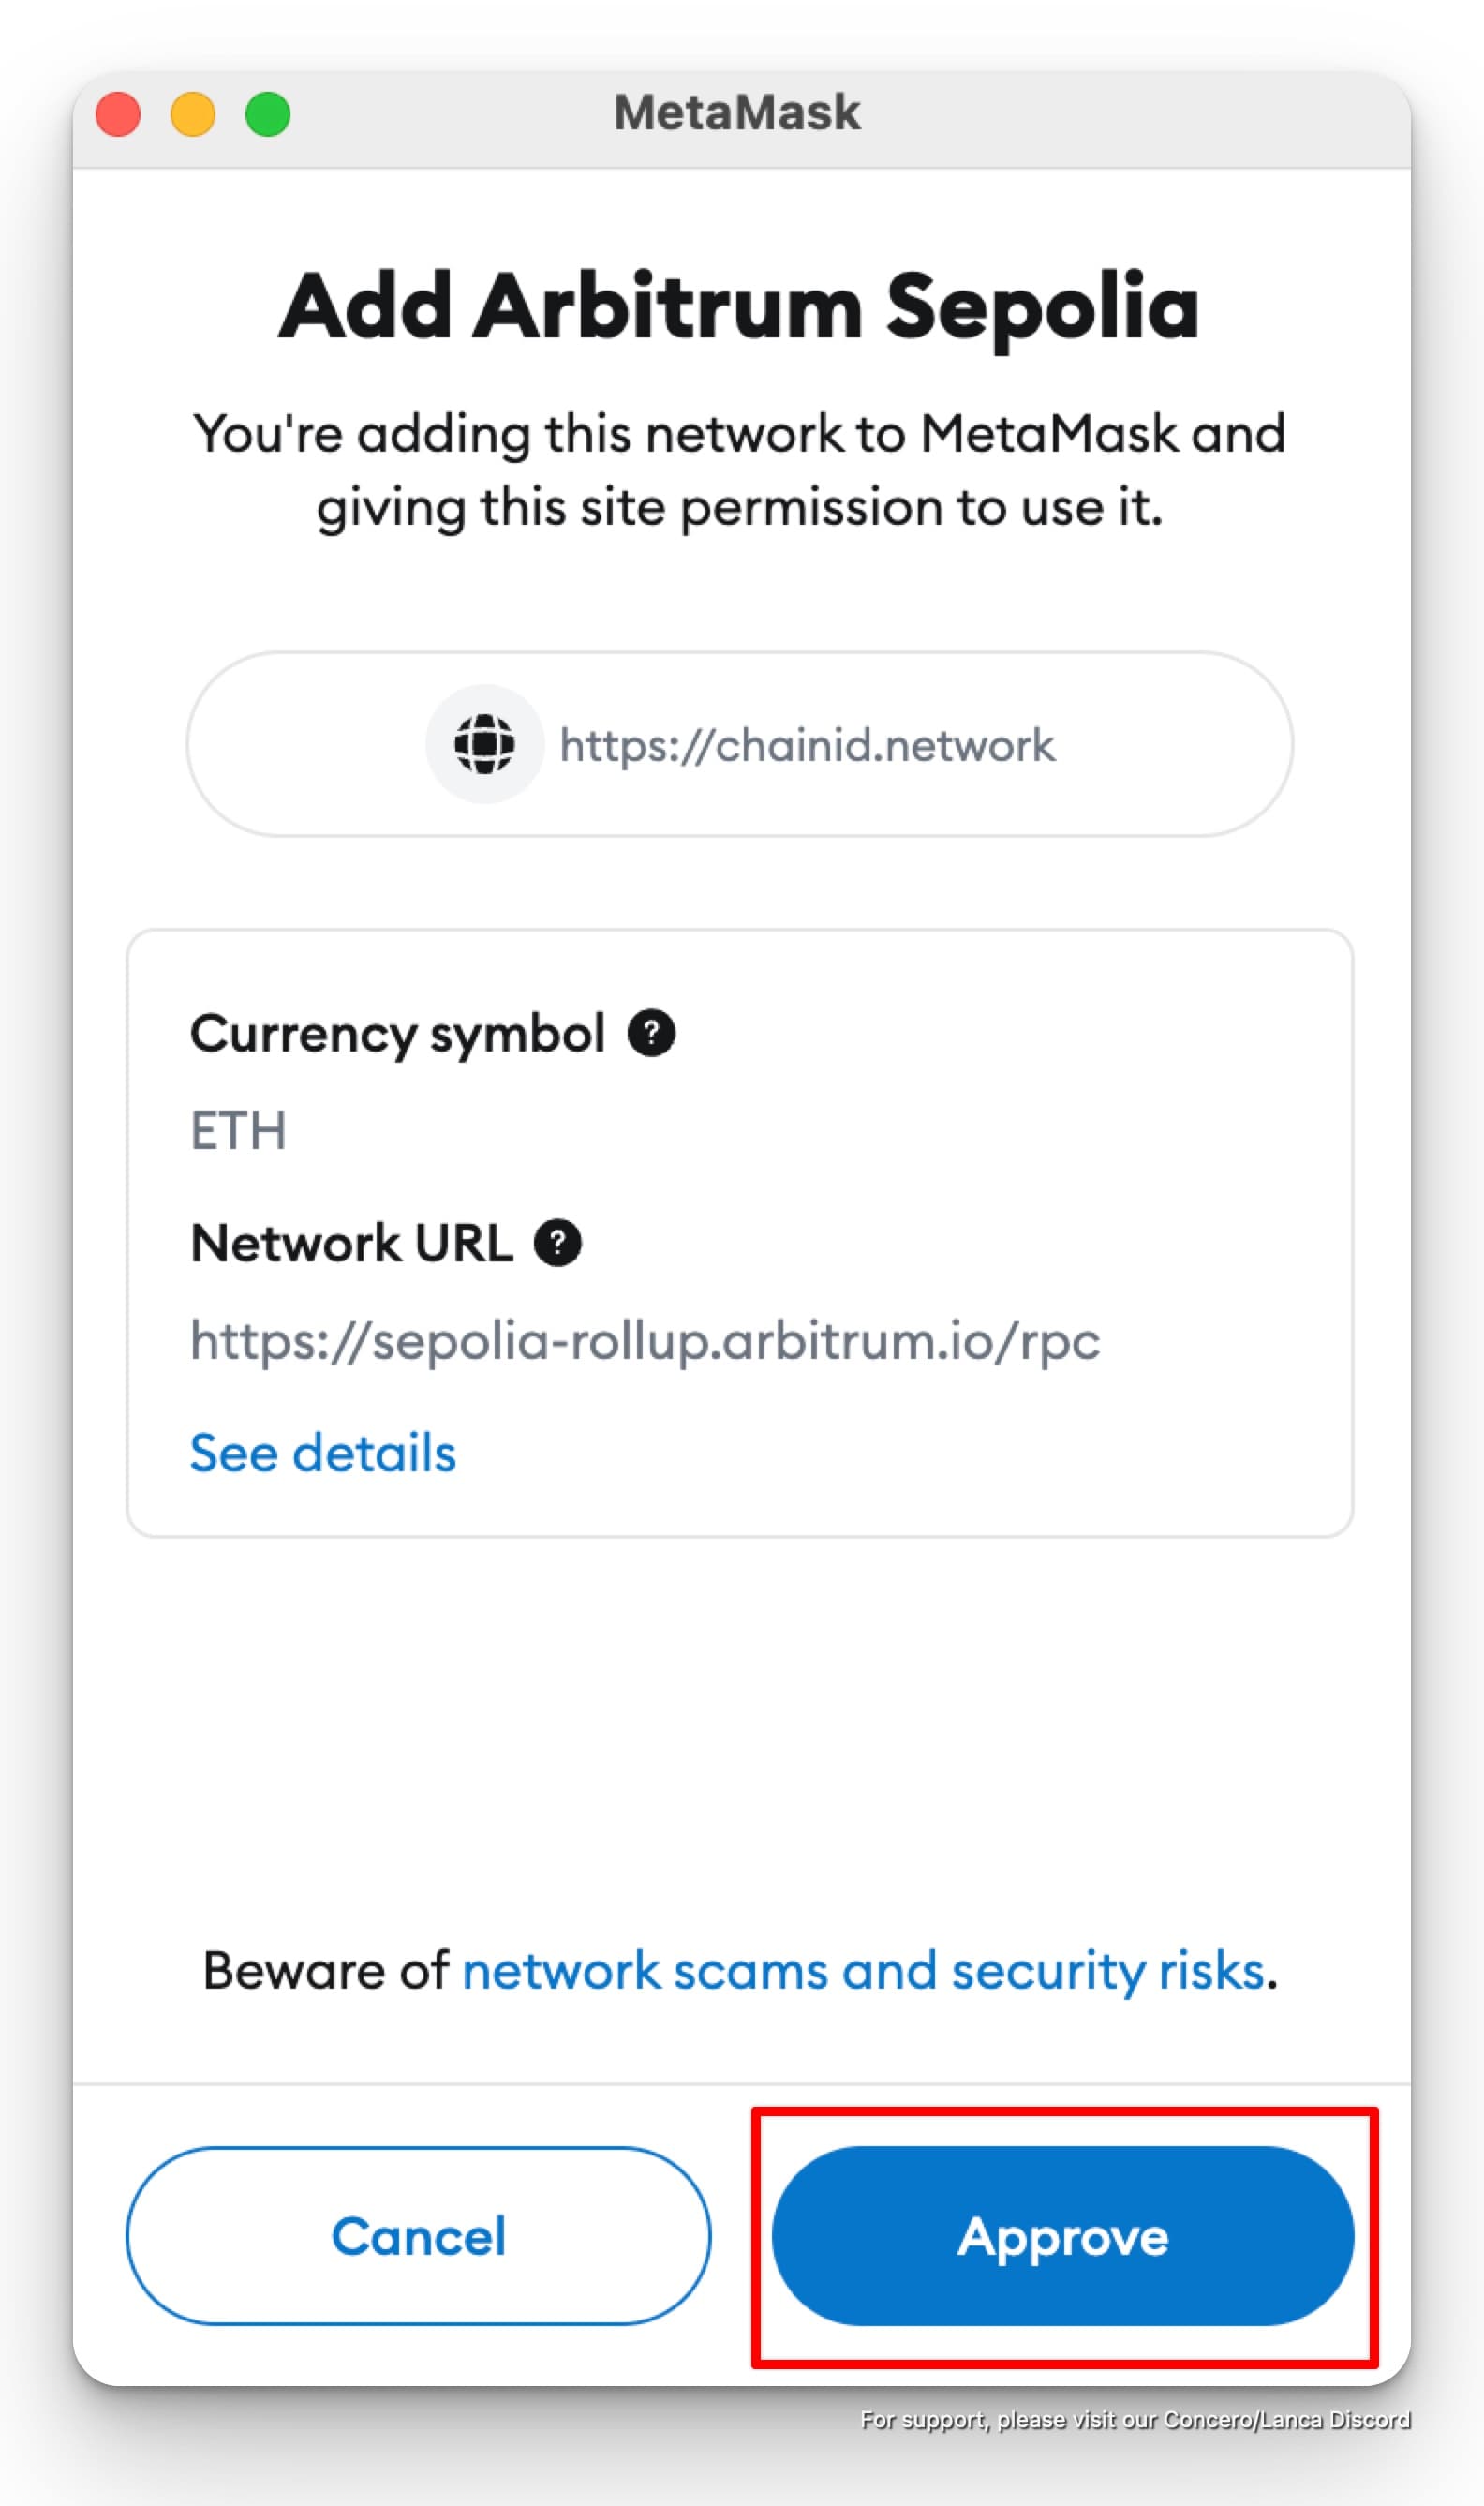
A prompt will appear to ask for your approval to add "Arbitrum Sepolia" network to your wallet. Click on "Approve".
Notes:
You can also use Chainlist to add testnet networks to your wallet. However, we found that there might be some issues with adding testnet networks to Metamask using Chainlist.
If you can not add the network automatically, please add the network manually as per the steps below.
2. Manually by adding the network information
For some reason, you may not be able to add the network automatically. In this case, you can manually add the network information.
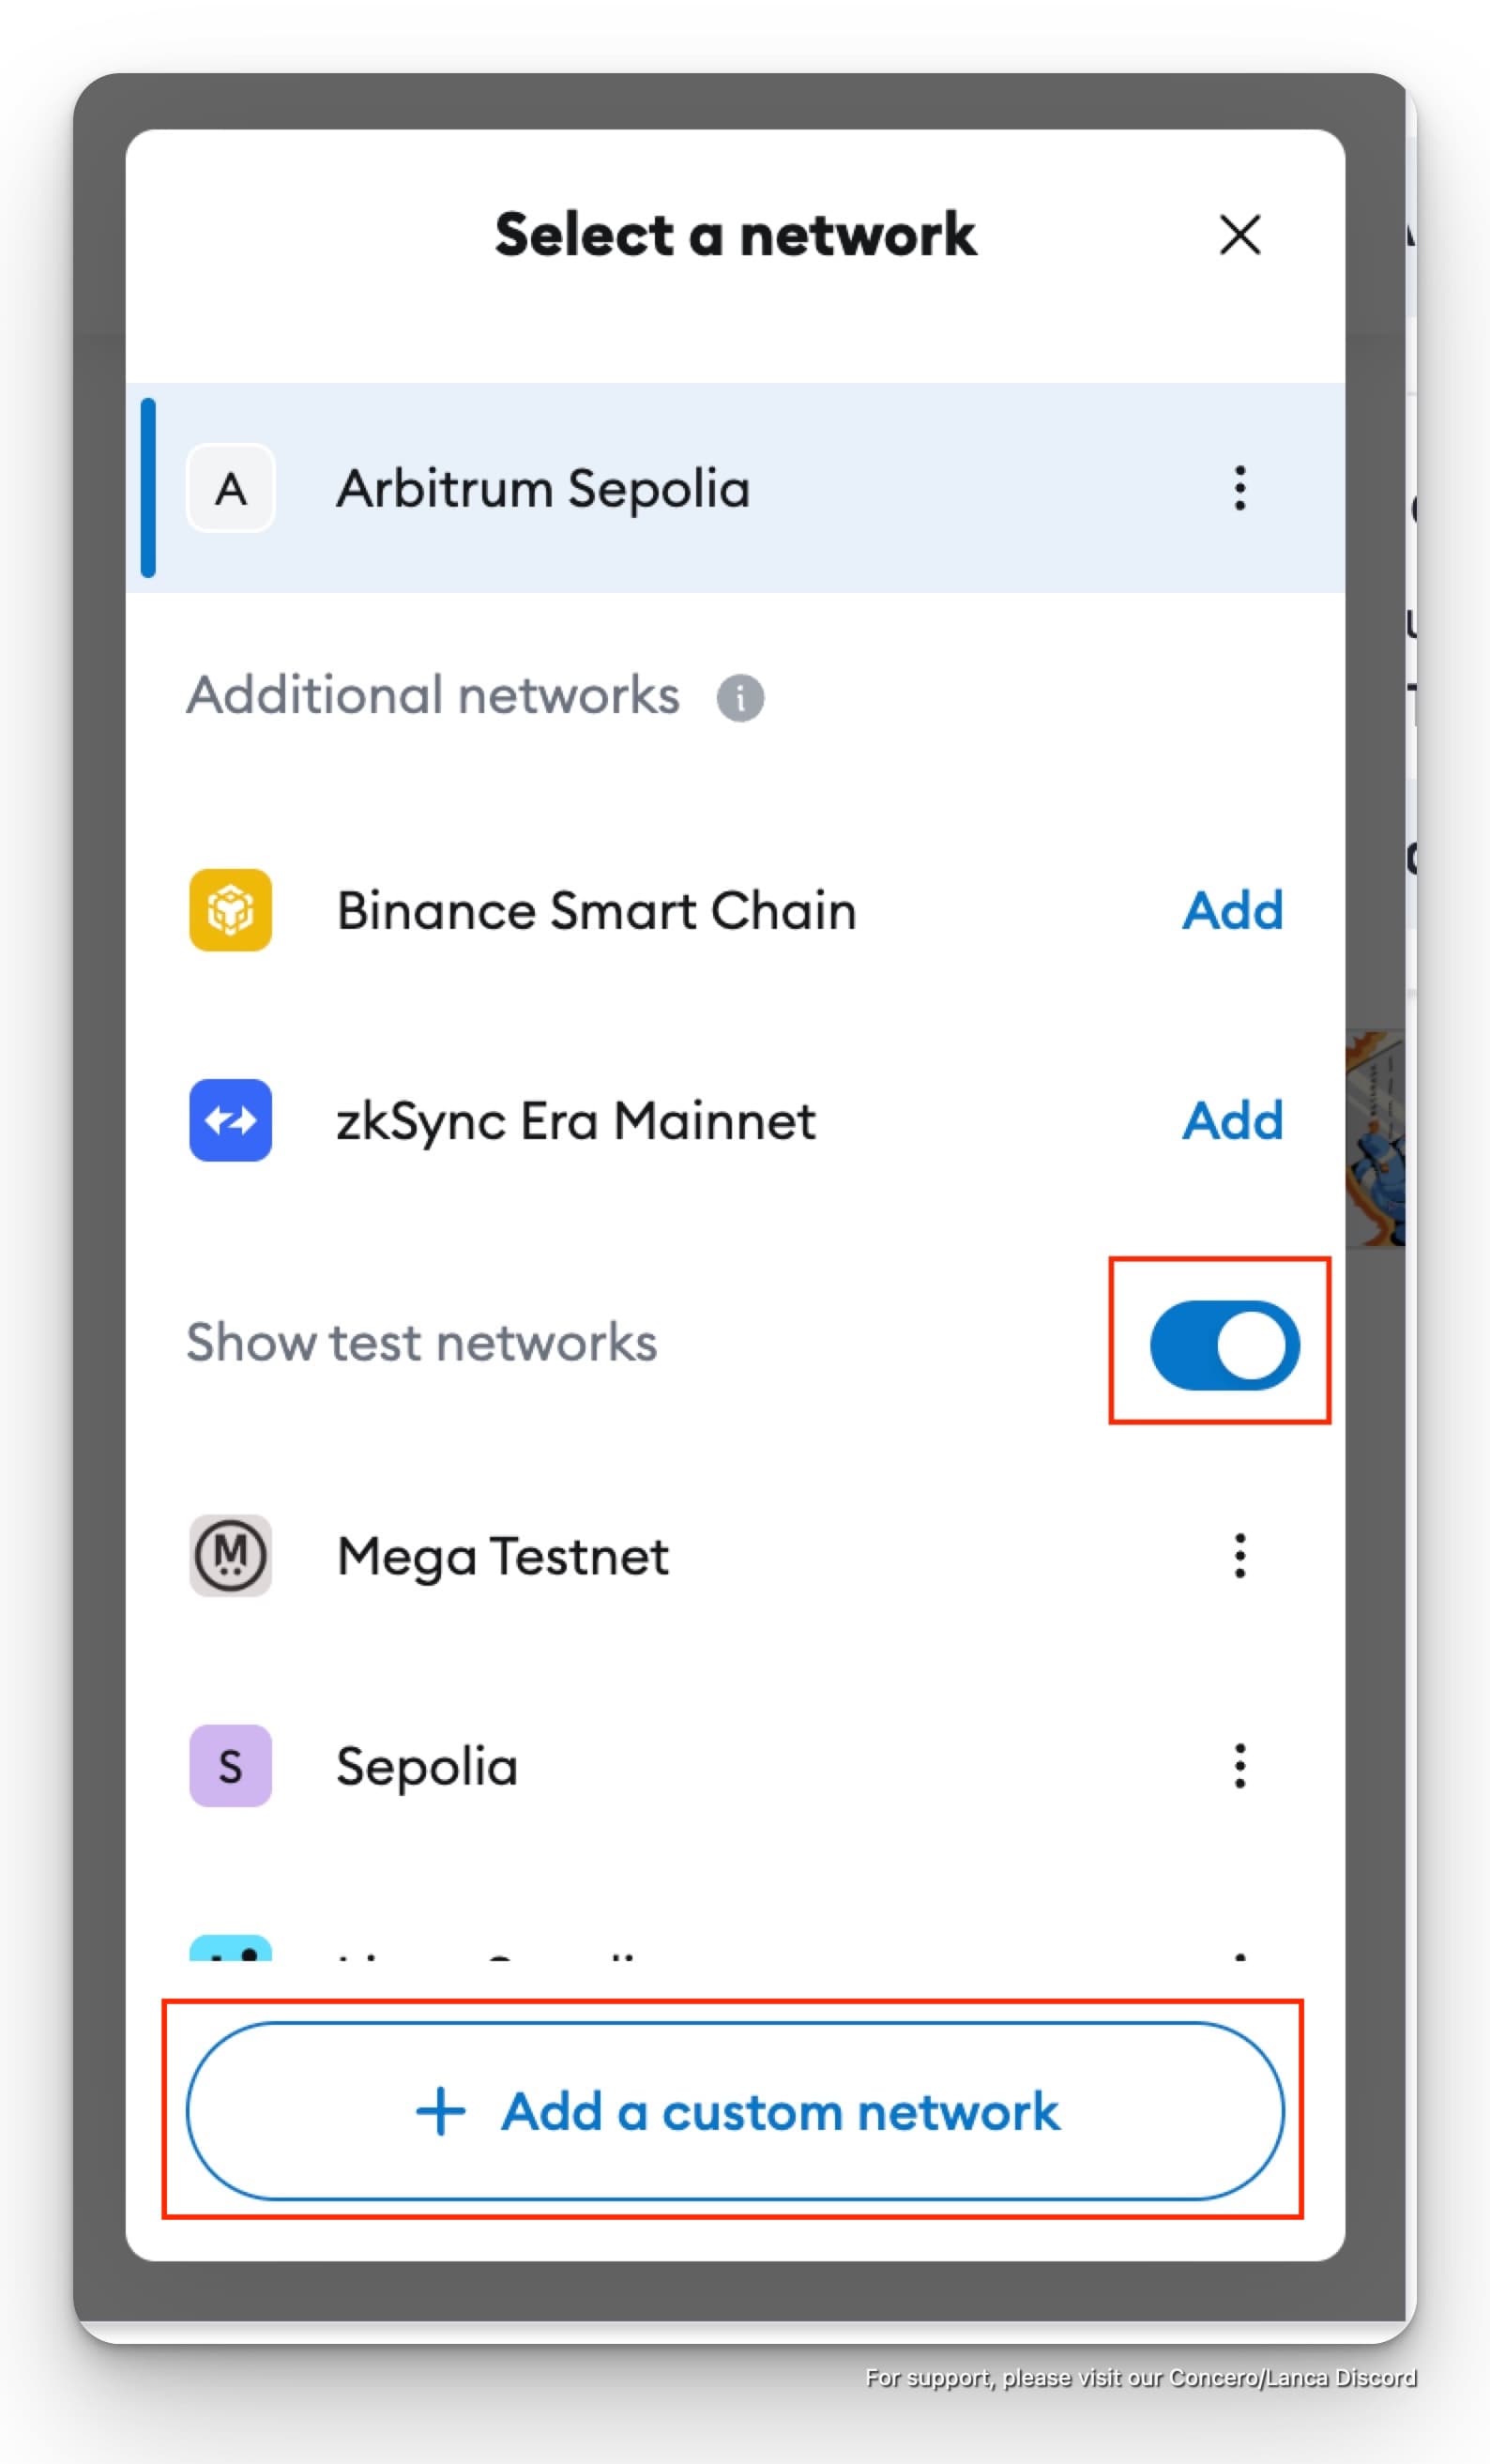
Click on the Metamask extension icon in the top right corner of your browser. Then choose the Network management tab (the red box in the image below).

To see testnet networks, please enable the "Show test networks" option. Then click on "Add a custom network".
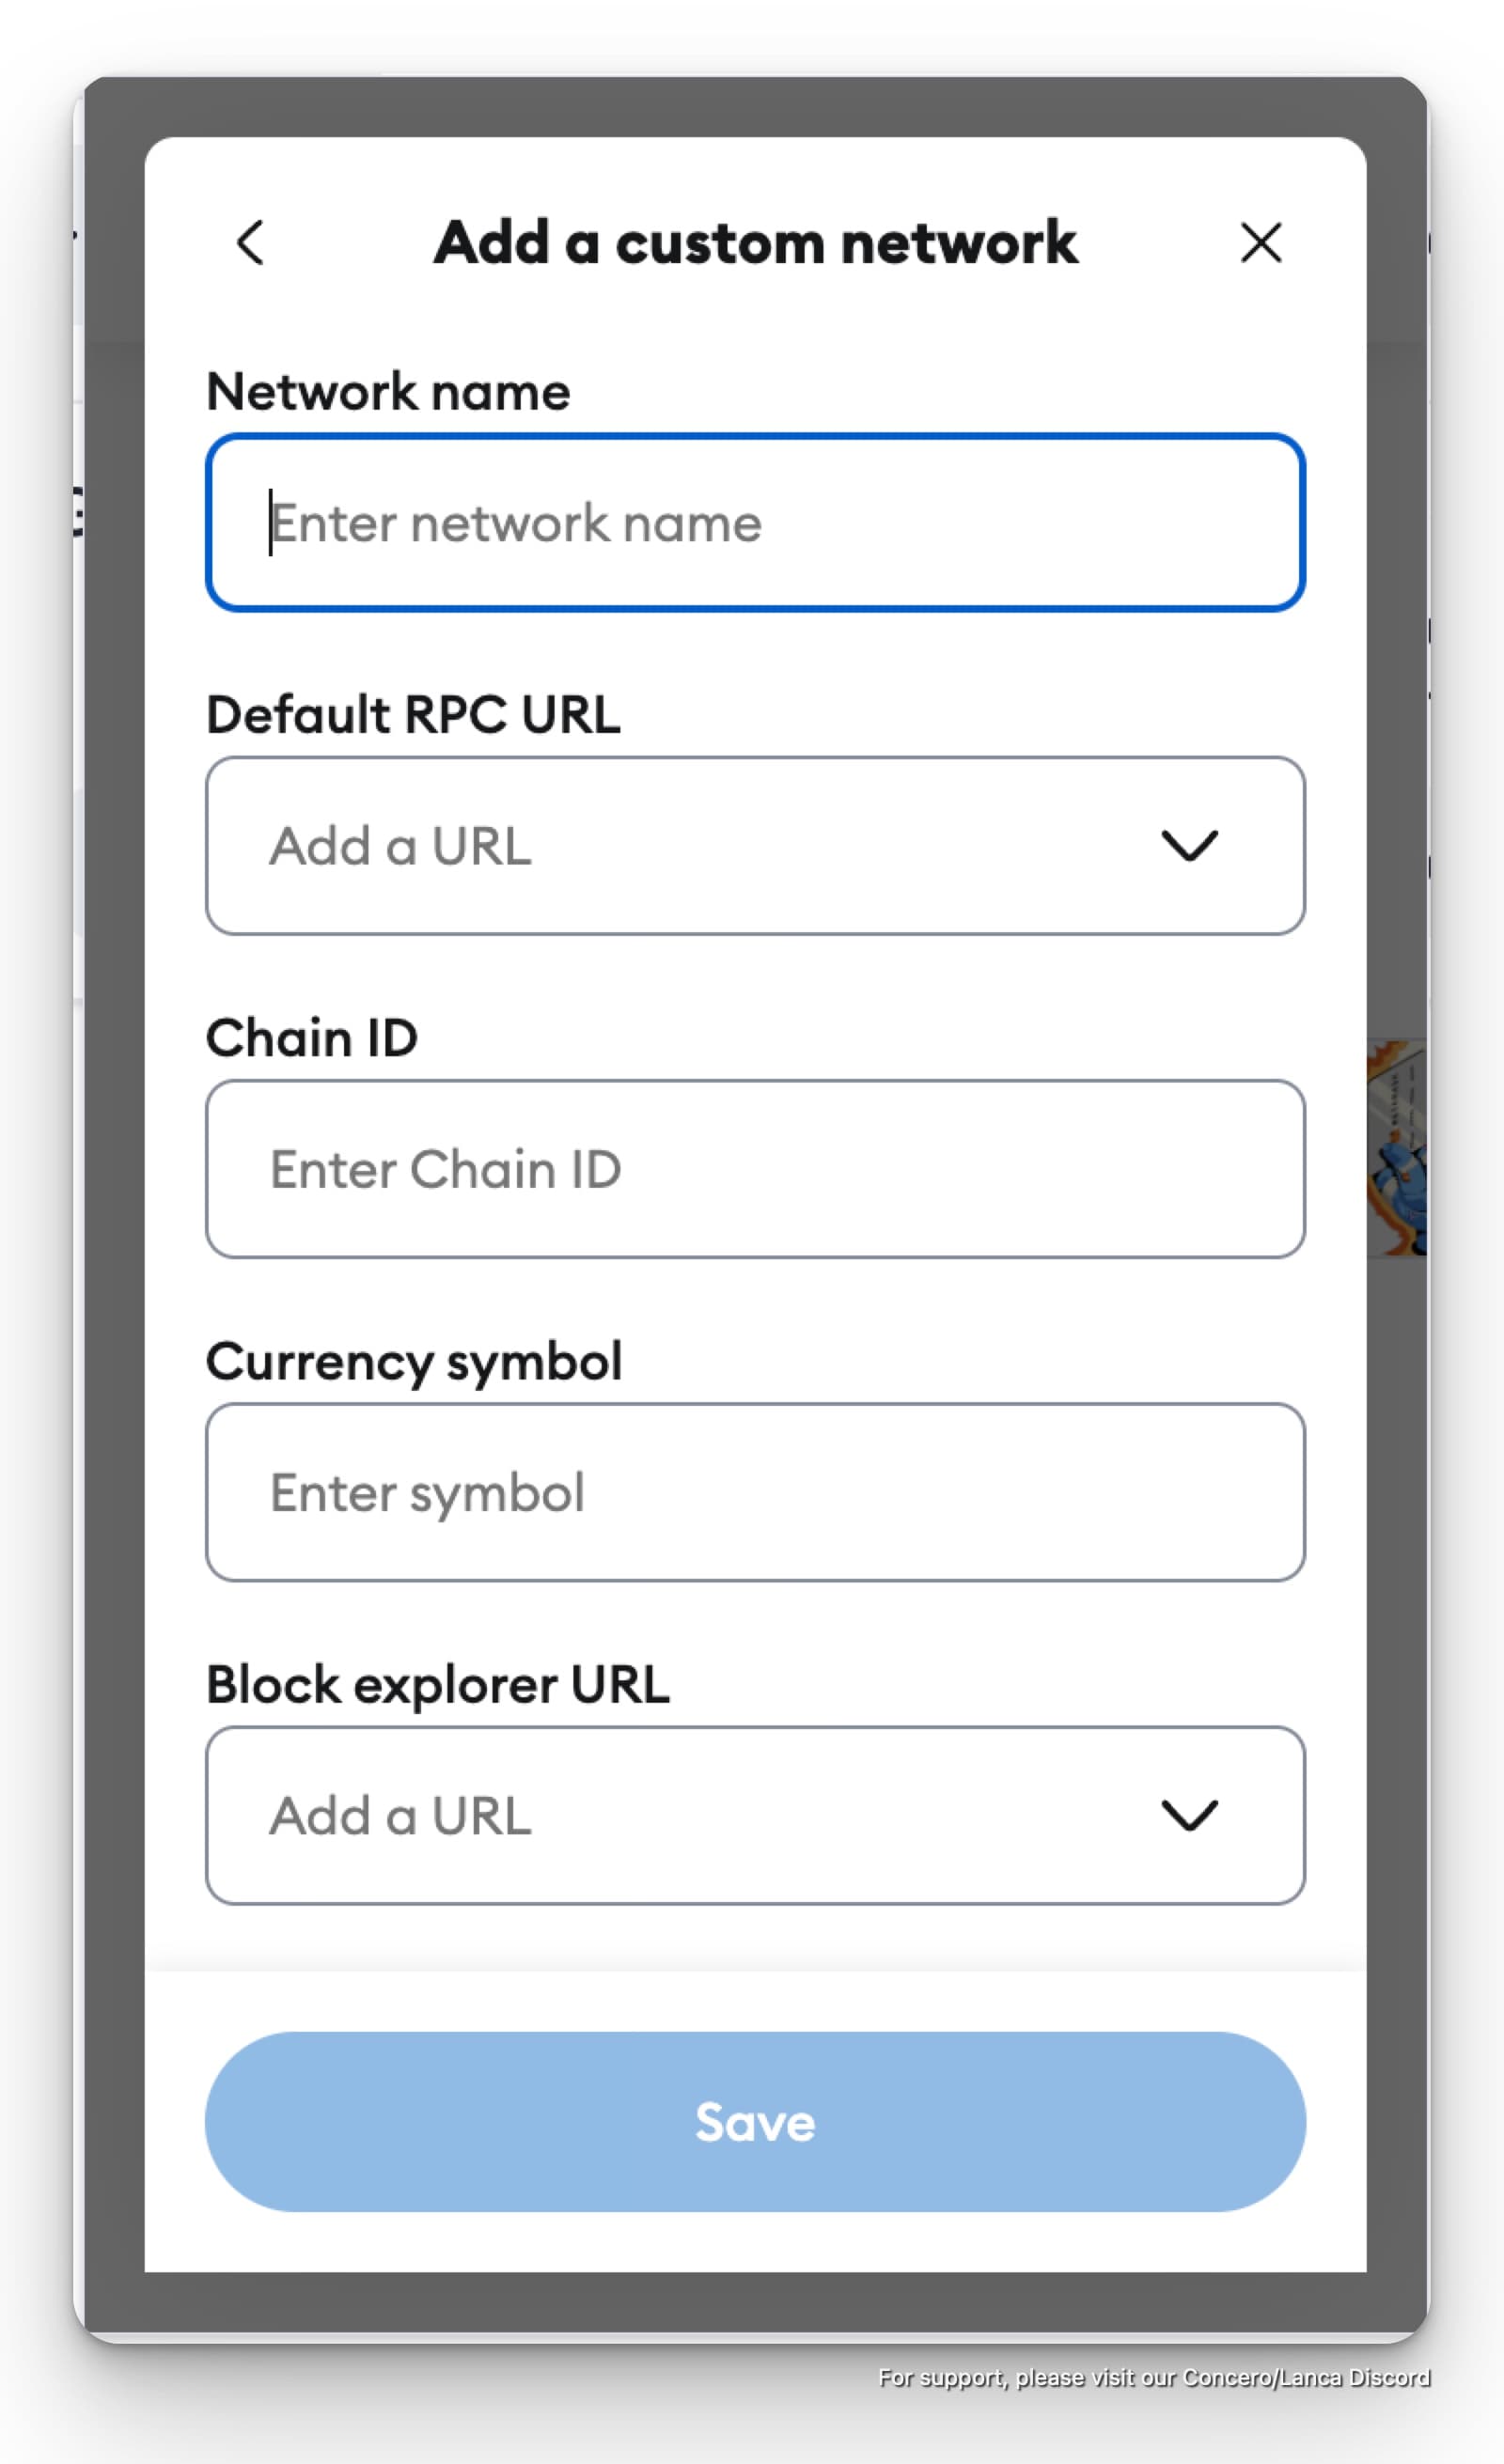
A prompt will appear to ask for network information, including: Network name, RPC URL, Chain ID, Currency Symbol, Block Explorer URL.
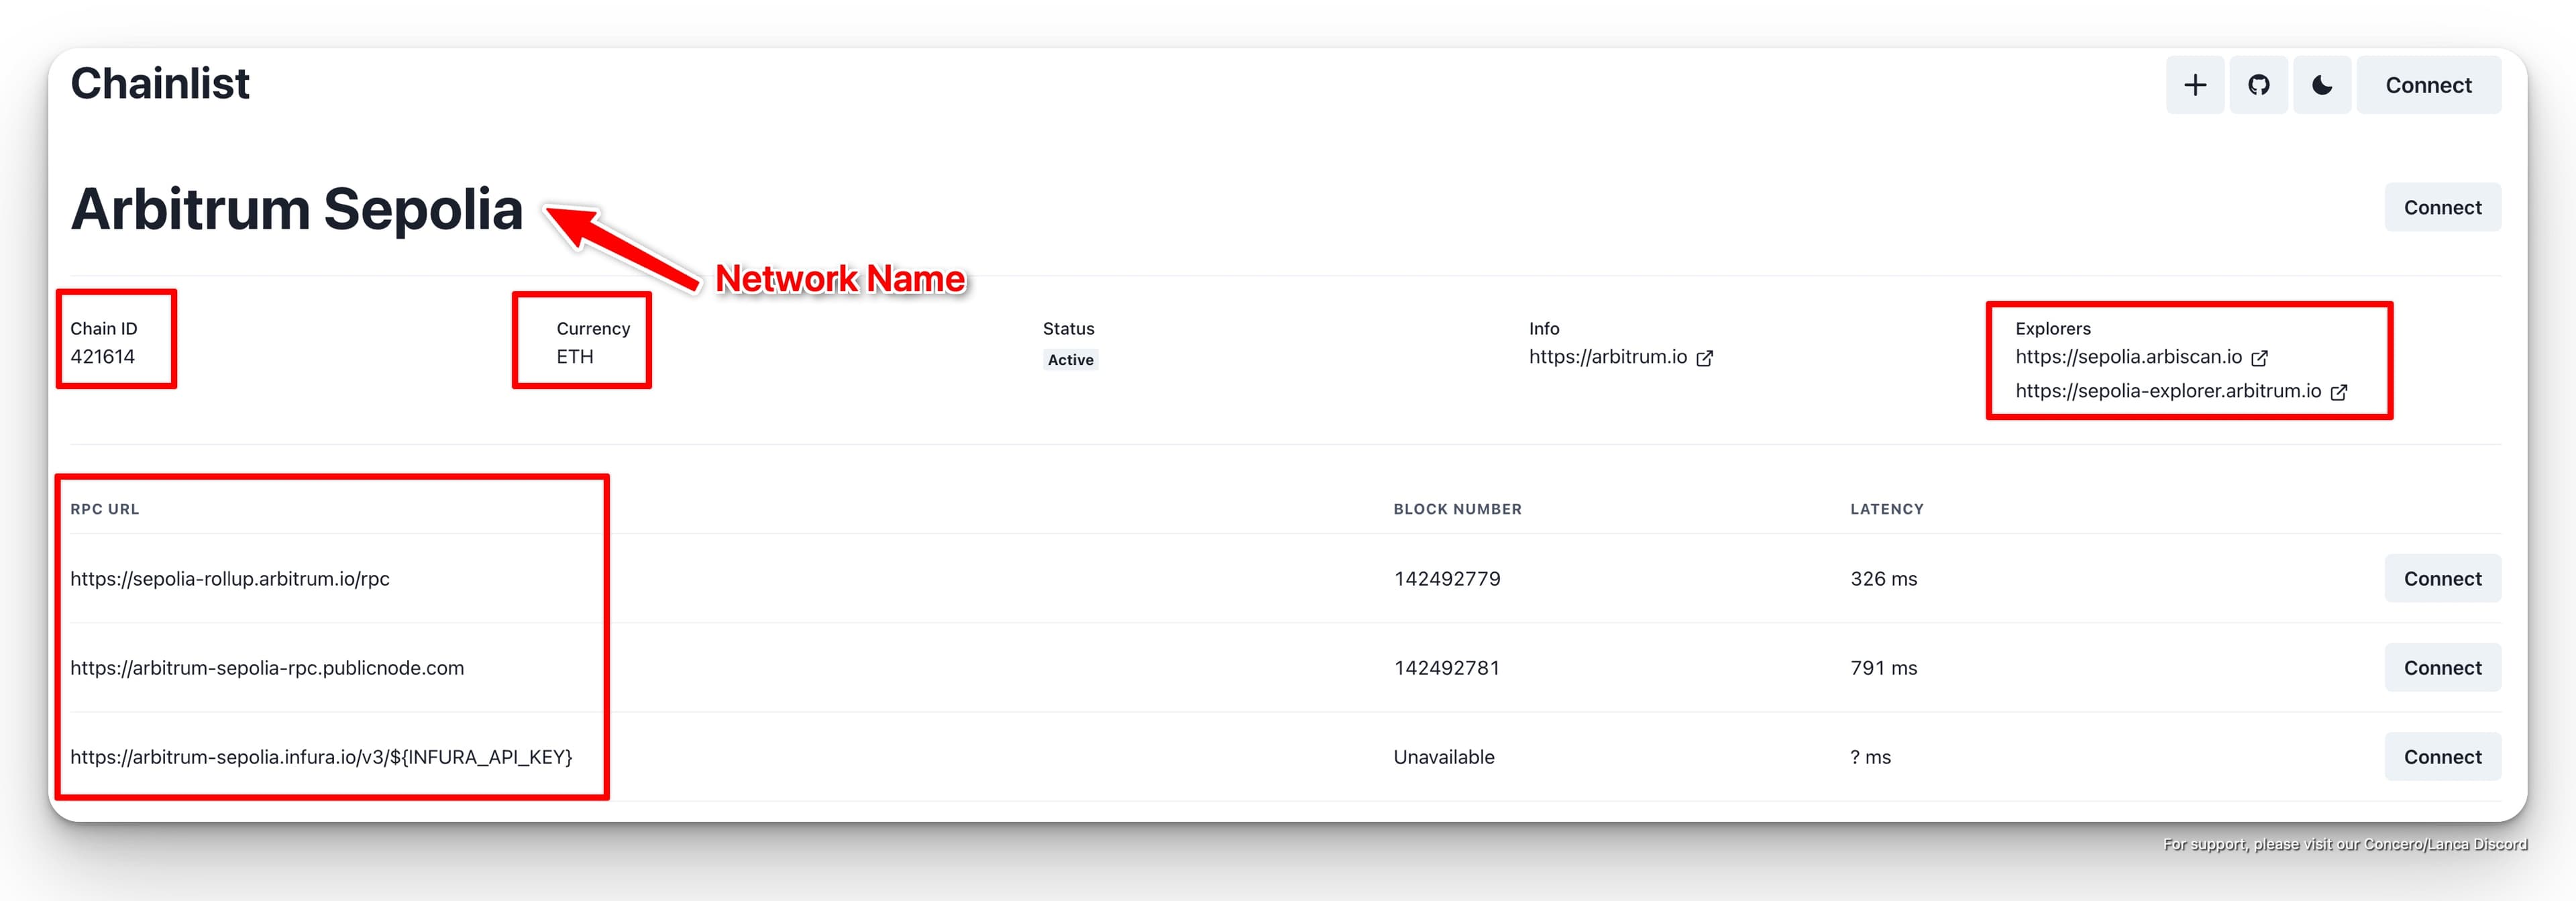
For this information, you can find it on the Chainid website.
For example, for Arbitrum Sepolia testnet, you can click to that network and find the required information.
Copy the information and paste into the custom network prompt. Once finished, click on "Save" button.
If you want to add other testnet networks, you can repeat the same steps as above.
Conclusion
Congratulations! Now you know how to add a custom network to your Metamask wallet. You are now ready to test the Concero V2 testnet.
Head to the tutorial on how to test Concero V2 Public Testnet, to start your first transaction on our testnet.
🤝 Follow us for upcoming updates on Concero Socials :
Concero.io | Concero Blog | Twitter | Discord | Telegram